Suggested Tutorials
Bootstrap | Text Articles & Slides
Angular 1 | Text Articles & Slides
Angular 2 | Text Articles & Slides
Angular CLI | Text Articles & Slides
Bootstrap | Text Articles & Slides
Angular 1 | Text Articles & Slides
Angular 2 | Text Articles & Slides
Angular CLI | Text Articles & Slides
- 1. Angular Project Setup | Text | Slides
- 2. Reading Data in Angular | Text | Slides
- 3. Angular Routing and Navigation | Text | Slides
- 4. Angular base href | Text | Slides
- 5. Angular Forms Tutorial | Text | Slides
- 6. Bootstrap Radio Buttons in Angular | Text | Slides
- 7. Angular radio button checked by default | Text | Slides
- 8. Bootstrap checkbox in angular | Text | Slides
- 9. Angular bootstrap select list | Text | Slides
- 10. Angular select options from array | Text | Slides
- 11. Angular datepicker tutorial | Text | Slides
- 12. Customise ngx-bootstrap datepicker | Text | Slides
- 13. Angular ngif directive | Text | Slides
- 14. Angular disable browser validation | Text | Slides
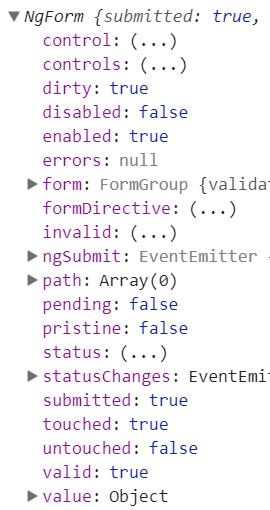
- 15. Angular form validation | Text | Slides
- 16. Displaying angular form validation error messages | Text | Slides
- 17. Model binding in angular template driven forms | Text | Slides
- 18. Angular email validation example | Text | Slides
- 19. Angular regular expression validation | Text | Slides
- 20. Angular radio button validation | Text | Slides
- 21. Add required attribute dynamically in angular | Text | Slides
- 22. Angular checkbox validation | Text | Slides
- 23. Angular select list validation | Text | Slides
- 24. Angular value vs ngValue | Text | Slides
- 25. Angular custom validator example template driven forms | Text | Slides
- 26. Angular select list required custom validator | Text | Slides
- 27. Angular password and confirm password validation | Text | Slides
- 28. Angular trigger validation manually | Text | Slides
- 29. Angular form group validation | Text | Slides
- 30. Angular 5 services tutorial | Text | Slides
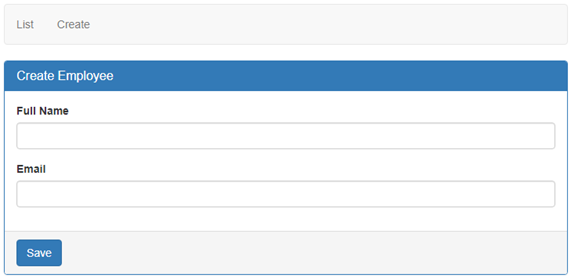
- 31. Create operation in angular | Text | Slides
- 32. Angular switch case example | Text | Slides
- 33. Pass data from parent to child component in angular | Text | Slides
- 34. Angular component input property change detection | Text | Slides
- 35. Angular input change detection using property setter | Text | Slides
- 36. Angular property setter vs ngonchanges | Text | Slides
- 37. Angular component communication | Text | Slides
- 38. Call child component methods and properties using template reference variable | Text | Slides
- 39. Angular route guards | Text | Slides
- 40. Angular route params | Text | Slides
- 41. Angular read route parameters | Text | Slides
- 42. Subscribe to angular route parameter changes | Text | Slides
- 43. Angular optional route parameters | Text | Slides
- 44. Angular required route parameter vs optional route parameter | Text | Slides
- 45. Angular form reset | Text | Slides
- 46. JavaScript objects and reference variables | Text | Slides
- 47. Filter pipe in angular | Text | Slides
- 48. Angular pure pipe | Text | Slides
- 49. Angular impure pipe | Text | Slides
- 50. Data filtering in angular component | Text | Slides
- 51. Angular query params | Text | Slides
- 52. Angular read query string parameters | Text | Slides
- 53. Create observable from array | Text | Slides
- 54. Angular resolve guard | Text | Slides
- 55. Angular router navigation events | Text | Slides
- 56. Angular route loading indicator | Text | Slides
- 57. Angular canactivate guard example | Text | Slides
- 58. Passing data between components in angular | Text | Slides
- 59. Edit form in angular | Text | Slides
- 60. Angular delete form | Text | Slides
- 61. Angular accordion example | Text | Slides
- 62. Angular content projection | Text | Slides
- 63. Online fake REST API | Text | Slides
- 64. Angular client server architecture | Text | Slides
- 65. Angular HttpClient get example | Text | Slides
- 66. Angular HttpClient error handling | Text | Slides
- 67. Handling angular resolver errors | Text | Slides
- 68. Angular httpclient post example | Text | Slides
- 69. Angular httpclient put example | Text | Slides
- 70. Angular httpclient delete example | Text | Slides
- 71. Angular CRUD course wrap up and what's next | Text | Slides