Support us .Net Basics C# SQL ASP.NET Aarvi MVC Slides C# Programs Subscribe Download

HTTP GET PUT POST DELETE

Suggested Videos
Part 1 - What is ASP.NET Web API
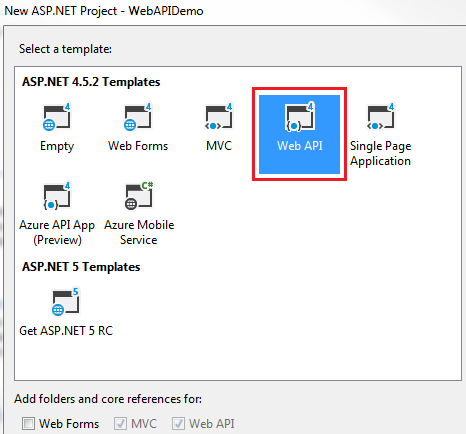
Part 2 - Creating a Web API Project


In this video we will discuss HTTP PUT, POST and DELETE verbs. This is continuation to Part 2. Please watch Part 2 from ASP.NET Web API tutorial before proceeding.


When we talk about a database table row, these are the following 4 actions that we can perform on the row
C - Create a row
R - Read a row
U - Update a row
D - Delete a row

In the context of an ASP.NET Web API resource these 4 actions correspond to GET, POST, PUT and DELETE as shown in the table below
CRUD HTTP Verb
Create POST
Read GET
Update PUT
Delete DELETE

Let us now understand some terms and concepts related to HTTP request and response system.

Request Verbs : These HTTP verbs (GET, POST, PUT & DELETE) describe what should be done with the resource. For example do you want to create, read, update or delete an entity. GET, PUT, POST and DELETE http verbs are the most commonly used one's. For the complete list of the HTTP verbs, please check http://www.w3.org/Protocols/rfc2616/rfc2616-sec9.html

Request Header : When a client sends request to the server, the request contains a header and a body. The request header contains additional information such as what type of response is required. For example, do you want the response to be in XML or JSON.

Request Body : Request Body contains the data to send to the server. For example, a POST request contains the data for the new item that you want to create. The data format may be in XML or JSON.

Response Body : The Response Body contains the data sent as response from the server. For example, if the request is for a specific product, the response body includes product details either in XML or JSON format.

Response Status codes : These are the HTTP status codes, that give the client details on the status of the request. Some of the common status codes are 200/OK, 404/Not Found, 204/No Content. For the complete list of HTTP status codes and what they mean, please visit http://www.w3.org/Protocols/rfc2616/rfc2616-sec9.html

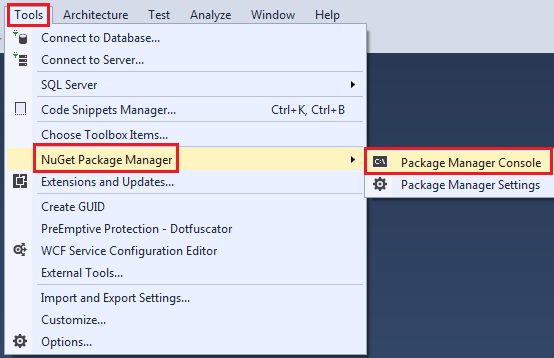
We will use a tool called fiddler to perform POST, PUT & DELETE actions. You can download fiddler from the following link
https://www.telerik.com/download/fiddler

Modify the ValuesController as shown below, so that it can support POST, PUT and DELETE actions.

public class ValuesController : ApiController
{
    static List<string> strings = new List<string>()
    {
        "value0", "value1", "value2"
    };
    // GET api/values
    public IEnumerable<string> Get()
    {
        return strings;
    }

    // GET api/values/5
    public string Get(int id)
    {
        return strings[id];
    }

    // POST api/values
    public void Post([FromBody]string value)
    {
        strings.Add(value);
    }

    // PUT api/values/5
    public void Put(int id, [FromBody]string value)
    {
        strings[id] = value;
    }

    // DELETE api/values/5
    public void Delete(int id)
    {
        strings.RemoveAt(id);
    }
}

Post(), Put() and Delete() methods in our ValuesController are returning void. That is the reason we are getting status code 204 No Content. An action that returns void will send status code 204 No Content. With ASP.NET Web API, we can control what status codes these methods return. We will discuss how to do that in a later video.

ASP.NET Web API tutorial for beginners

HTTP GET PUT POST DELETE


Creating a Web API Project

Suggested Videos
Part 1 - What is ASP.NET Web API


In this video we will discuss
1. Creating a new ASP.NET Web API Project
2. Explore and understand the Web API code auto-generated by Visual Studio 


For this course, we will be using Visual Studio 2015.

Creating a new ASP.NET Web API Project
1. Open Visual Studio and select File - New - Project

2. In the "New Project" window
    Select "Visual C#" under "Installed - Templates"
    From the middle pane select, ASP.NET Web Application
    Name the project "WebAPIDemo" and click "OK"

creating a new web api project

3. On the next window, select "Web API" and click "OK"

create rest service asp.net web api

While creating the Web API project, you may get the following errors
Package Installation Error - Could not add all required packages to the project. The following packages failed to install from 'C:\Program Files (x86)\Microsoft ASP.NET\ASP.NET Web Stack 5\Packages'

Failed to initialize the PowerShell host.

If you do then follow the below steps which may help resolve the issue
1. Close all instances of Visual Studio

2. Open Windows Powershell as an Administrator and execute the following command
Set ExecutionPolicy AllSigned

3. Run Visual Studio 2015 as an Administrator

4. Open Package Manager Console window in Visual Studio. To do this click on Tools - NuGet Package Manager - Package Manager Console

failed to initialize powershell host vs 2015

5 In the Package Manager Console, type [R] for Run once and press the Enter key

At this point, you will be able to create a new Web API project.

Now, let us explore and understand the Web API code auto-generated by Visual Studio

1. If you have worked with ASP.NET MVC, then project folder structure should be familiar to you. Notice with in the Controllers folder we have ValuesController which inherits from ApiController class that is present in System.Web.Http namespace. This is different from the MVC controller. The MVC Controller class inherits from the Controller class that is present in System.Web.Mvc namespace. The HomeController class which is an MVC controller inherits from the Controller class.

2. Notice in the ValuesController class we have methods (Get, Put, Post & Delete) that map to the HTTP verbs (GET, PUT, POST, DELETE) respectively. We have 2 overloaded versions of Get() method - One without any parameters and the other with id parameter. Both of these methods respond to the GET http verb depending on whether the id parameter is specified in the URI or not.

3. Now let's look at the default route that is in place for our Web API project. We have the Application_Start() event handler In Global.asax file. This event is raised when the application starts. In the Application_Start() event handler method we have configuration for Filters, Bundles etc. The one that we are interested in is the configuration for our Web API project, which is in WebApiConfig.Register() method. Right click on WebApiConfig.Register and select "Go To Definition" from the context menu. This will take you to the Register() method in the WebApiConfig class. This class is in App_Start folder.

4. In the Register() method we have the default route configured for our Web API project. Web API routes are different from the MVC routes. You can find the MVC routes in RouteConfig.cs file in App_Start folder.

5. The default Web API route starts with the word api and then / and then the name of the controller and another / and an optiontion id parameter.
"api/{controller}/{id}"

6. At this point if we use the following URI in the browser, we get an error - Authorization has been denied for this request.
http://localhost/api/values

7. To get rid of this error, comment Authorize attribute on the ValuesController class. This is related to security which we will discuss in a later video.

8. Now if you visit, http://localhost/api/values, you should see the following XML as the result
<ArrayOfstring xmlns:i="http://www.w3.org/2001/XMLSchema-instance"
               xmlns="http://schemas.microsoft.com/2003/10/Serialization/Arrays">
<string>value1</string>
<string>value2</string>
</ArrayOfstring>

9. Let us understand what is going on here. The name of the controller is values. So if we use a URI http://localhost:portnumber/api/values, then the web api is going to look for a controller with name Values + the word controller in your project. So if you have specified values in the URI it is going to look for ValuesController, if you specify Products, then it is going to look for ProductsController. This is all by convention and works this way out of the box.

10. In a real world application this might be the domain name, for example
http://pragimtech.com/api/values

11. The browser is issuing a GET request which maps to the Get() method in the ValuesController class. The GET() in the values controller is returning value1 and value2 which is what we see in the browser.

12. We have another overload of GET() method which takes Id parameter. Remember with the default route, the id parameter is optional. That is the reason we are able to call the GET method with or without the Id parameter. If the id parameter is specified in the URI, then the Get() method with the parameter in values controller is called

13. If a controller with the specified name is not found you will get an error. For example, in your project if you comment the ValuesController class in your project and then use the URI /api/values you will get the following error

No HTTP resource was found that matches the request URI 'http://localhost:15648/api/values'. No type was found that matches the controller named 'values'.

In our next video we will discuss how to perform the rest of the actions PUT, POST and DELETE.

ASP.NET Web API tutorial for beginners

Creating a Web API Project


What is ASP.NET Web API

Suggested Tutorials
AngularJS tutorial for beginners
jQuery tutorial for beginners
ASP.NET tutorial for beginners


In this video we will discuss 
  • What is ASP.NET Web API 
  • What are RESTful services
  • Difference between WCF and Web API. When to use WCF over ASP.NET Web API and vice versa


What is ASP.NET Web API ?
The term API stands for ‘Application Programming Interface’. ASP.NET Web API is a framework for building Web API’s, i.e. HTTP based services on top of the .NET Framework. The most common use case for using Web API is for building RESTful services. These services can then be consumed by a broad range of clients like
1. Browsers
2. Mobile applications
3. Desktop applications
4. IOTs

What are IOTs
The term IOTs stands for Internet Of Things. Internet Of Things are the objects or devices that have an IP address and can communicate over the internet with other internet enabled devices and objects. Examples for IoT include security systems, electronic appliances, thermostats, cars etc..., in addition to desktops, laptops, and smart phones.

One important thing to keep in mind is that, though ASP.NET Web API framework is widely used to create RESTful services, it can also be used to create services that are not RESTful. In short, ASP.NET Web API framework does not dictate any specific architeture style for creating services. In this video, we will discuss creating RESTful services from scratch using ASP.NET Web API framework.

What are RESTful services
REST stands for Representational State Transfer. REST was first introduced in the year 2000 by Roy Fielding as part of his doctoral dissertation. REST is an architectural pattern for creating an API that uses HTTP as its underlying communication method. The REST architectural pattern specifies a set of constraints that a system should adhere to. Here are the REST constraints.

Client Server constraint - This is the first constraint. Client sends a request and the server sends a response. This separation of concerns supports the independent evolution of the client-side logic and server-side logic.

Stateless constraint - The next constraint is the stateless constraint. The communication between the client and the server must be stateless between requests. This means we should not be storing anything on the server related to the client. The request from the client should contain all the necessary information for the server to process that request. This ensures that each request can be treated independently by the server.

Cacheable constraint - Some data provided by the server like list of products, or list of departments in a company does not change that often. This constraint says that let the client know how long this data is good for, so that the client does not have to come back to the server for that data over and over again.

Uniform Interface - The uniform interface constraint defines the interface between the client and the server. To understand the uniform interface constraint, we need to understand what a resource is and the HTTP verbs - GET, PUT, POST & DELETE. In the context of a REST API, resources typically represent data entities. Product, Employee, Customer etc are all resources. The HTTP verb (GET, PUT, POST, DELETE) that is sent with each request tells the API what to do with the resource. Each resource is identified by a specific URI (Uniform Resource Identifier). The following table shows some typical requests that you see in an API

Resource Verb Outcome
/Employees GET Gets list of employees
/Employee/1 GET Gets employee with Id = 1
/Employees POST Creates a new employee
/Employee/1 PUT Updates employee with Id = 1
/Employee/1 DELETE Deletes employee with Id = 1

Another concept related to Uniform Interface is HATEOAS. HATEOAS stands for Hypermedia as the Engine of Application State. All this means is that in each request there will be set of hyperlinks that let's you know what other actions can be performed on the resource. If this is not clear at the moment, don't worry, we will discuss this in a later video.

There are 2 other constraints as well
Layered System
Code on Demand (optional)

Code on Demand constraint is optional. We will discuss these 2 constraints in a later video.

Difference between WCF and Web API. When to choose one over the other?
WCF (Windows Communication Foundation) - One of the choices available in .NET for creating RESTful services is WCF. The problem with WCF is that, a lot of configuration is required to turn a WCF service into a RESTful service. The more natural choice for creating RESTful services is ASP.NET Web API, which is specifically created for this purpose.

WCF is more suited for building services that are transport/protocol independent. For example, you want to build a single service, that can be consumed by 2 different clients - Let's say, a Java client and .NET client. Java client expects transport protocol to be HTTP and message format to be XML for interoperability, where as the .NET client expects the protocol to be TCP and the message format to be binary for performance. For this scenario WCF is the right choice. What we do here is create a single WCF service, and then configure 2 end points one for each client (i.e one for the Java client and the other for the .NET client). If you are new to WCF, please watch our WCF video series. I will have the link available in the description of this video.

There is nothing wrong to use WCF to create RESTful services. It's just that it's a bit more complex and configuration can be a headache. If you are stuck with .NET 3.5 or you have an existing SOAP service you must support but want to add REST to reach more clients, then use WCF. 

If you don't have the limitation of .NET 3.5 and you want to a create brand new restful service then use ASP.NET Web API.

In our upcoming videos in this series, we will discuss creating RESTful services from scratch using ASP.NET Web API framework.

ASP.NET Web API tutorial for beginners

What is ASP.NET Web API


Bootstrap multi column carousel

Suggested Video Tutorials
Part 49 - Bootstrap scrollspy vertical menu
Part 50 - Bootstrap affix plugin
Part 51 - Bootstrap image carousel


In this video we will discuss creating a multi column bootstrap carousel.


The carousel has 3 slides and each slide has 3 columns with one image in each column. The carousel moves from the images in one slide to another.

bootstrap multi column carousel

Here is the code used in the demo
<!doctype html>
<html>
<head>
    <meta name="viewport" content="width=device-width, initial-scale=1">
    <title>Bootstrap tutorial for begineers</title>
    <link href="bootstrap/css/bootstrap.min.css" rel="stylesheet">
    <link href="CustomStyles.css" rel="stylesheet" />
</head>
<body>
    <br />
    <div class="container">
        <div class="row">
            <div class="col-xs-12">

                <div id="imageCarousel" class="carousel slide" data-interval="2000"
                     data-ride="carousel" data-pause="hover" data-wrap="true">

                    <ol class="carousel-indicators">
                        <li data-target="#imageCarousel" data-slide-to="0" class="active"></li>
                        <li data-target="#imageCarousel" data-slide-to="1"></li>
                        <li data-target="#imageCarousel" data-slide-to="2"></li>
                    </ol>

                    <div class="carousel-inner">
                        <div class="item active">
                            <div class="row">
                                <div class="col-xs-4">
                                    <img src="Images/Desert.jpg" class="img-responsive">
                                    <div class="carousel-caption">
                                        <h3>Desert</h3>
                                        <p>Desert Image Description</p>
                                    </div>
                                </div>
                                <div class="col-xs-4">
                                    <img src="Images/Jellyfish.jpg" class="img-responsive">
                                    <div class="carousel-caption">
                                        <h3>Jellyfish</h3>
                                        <p>Jellyfish Image Description</p>
                                    </div>
                                </div>
                                <div class="col-xs-4">
                                    <img src="Images/Penguins.jpg" class="img-responsive">
                                    <div class="carousel-caption">
                                        <h3>Penguins</h3>
                                        <p>Penguins Image Description</p>
                                    </div>
                                </div>
                            </div>
                        </div>
                        <div class="item">
                            <div class="row">
                                <div class="col-xs-4">
                                    <img src="Images/Lighthouse.jpg" class="img-responsive">
                                    <div class="carousel-caption">
                                        <h3>Lighthouse</h3>
                                        <p>Lighthouse Image Description</p>
                                    </div>
                                </div>
                                <div class="col-xs-4">
                                    <img src="Images/Hydrangeas.jpg" class="img-responsive">
                                    <div class="carousel-caption">
                                        <h3>Hydrangeas</h3>
                                        <p>Hydrangeas Image Description</p>
                                    </div>
                                </div>
                                <div class="col-xs-4">
                                    <img src="Images/Koala.jpg" class="img-responsive">
                                    <div class="carousel-caption">
                                        <h3>Koala</h3>
                                        <p>Koala Image Description</p>
                                    </div>
                                </div>
                            </div>
                        </div>

                        <div class="item">
                            <div class="row">
                                <div class="col-xs-4">
                                    <img src="Images/tulips.jpg" class="img-responsive">
                                    <div class="carousel-caption">
                                        <h3>Tulips</h3>
                                        <p>Tulips Image Description</p>
                                    </div>
                                </div>
                                <div class="col-xs-4">
                                    <img src="Images/Chrysanthemum.jpg" class="img-responsive">
                                    <div class="carousel-caption">
                                        <h3>Chrysanthemum</h3>
                                        <p>Chrysanthemum Image Description</p>
                                    </div>
                                </div>
                                <div class="col-xs-4">
                                    <img src="Images/stripes.jpg" class="img-responsive">
                                    <div class="carousel-caption">
                                        <h3>Stripes</h3>
                                        <p>Stripes Image Description</p>
                                    </div>
                                </div>
                            </div>
                        </div>
                    </div>

                    <a href="#imageCarousel" class="carousel-control left" data-slide="prev">
                        <span class="glyphicon glyphicon-chevron-left"></span>
                    </a>
                    <a href="#imageCarousel" class="carousel-control right" data-slide="next">
                        <span class="glyphicon glyphicon-chevron-right"></span>
                    </a>
                </div>

            </div>
        </div>
    </div>

    <script src="https://ajax.googleapis.com/ajax/libs/jquery/1.11.3/jquery.min.js">
    </script>
    <script src="bootstrap/js/bootstrap.min.js"></script>
</body>
</html>

bootstrap tutorial for beginners